1. Save still pictures from any video, as often as you like
Paste a YouTube link, choose where the clip starts and ends, and pick "Frames" as the format. The cutter saves a picture from the video every tenth of a second, every half-second, every 1, 2, 5 or 10 seconds — whichever you choose — and packs them all into a single ZIP file. Each picture's filename includes the time it came from in the original video, so a file called frame-00-01-23.jpg is the frame that played at 1 minute 23 seconds. You can spot the moment you want from the file list, no need to open every image.
How often you grab a frame depends on what you need. Pick every 100 milliseconds (ten frames a second) when you're studying fast movement — a golf swing, a dance step, the way a character moves in an animation. Pick every 1 or 2 seconds for storyboards or recap shots, where roughly one image per scene is enough. Pick every 5 or 10 seconds when you're hunting through a long lecture or stream for the one good frame to use as a thumbnail, without sitting through the whole thing.
Inside each ZIP we drop a small text file listing the original YouTube link, the video title, the start and end times, the interval you picked, and the time of every frame. Open it any time later and you can tell at a glance which video the folder came from — handy when you find an old ZIP on your hard drive months down the line.

2. Print the time on each picture
The filenames already carry the time, but you don't always see filenames. Maybe you're flipping through pictures in a photo app, comparing two frames side by side, or printing the lot to pin on a wall. For those cases, switch on the "Stamp source timestamp" toggle. Every picture in the ZIP gets the time printed right onto it (something like 0:01:23) in the top-left corner — visible no matter where the picture ends up.
The numbers are drawn in a font where every digit takes up the same width. That sounds tiny, but it matters: when you flip through 30 frames of a tennis serve or a dance move, the time stays in the exact same spot on every image instead of shifting around. Your eye stays on the action, not on the wobbling clock.
The time goes in the top-left corner, where it stays out of the way of the picture. And it shows where the frame sits in the original video, not where it sits inside your clip. So if you cut from 1:30 to 2:00 and grab a frame in the middle, it reads 1:45 — the moment in the source video — not 0:15 from the start of your cut.
3. Get every frame on a single picture (contact sheet)
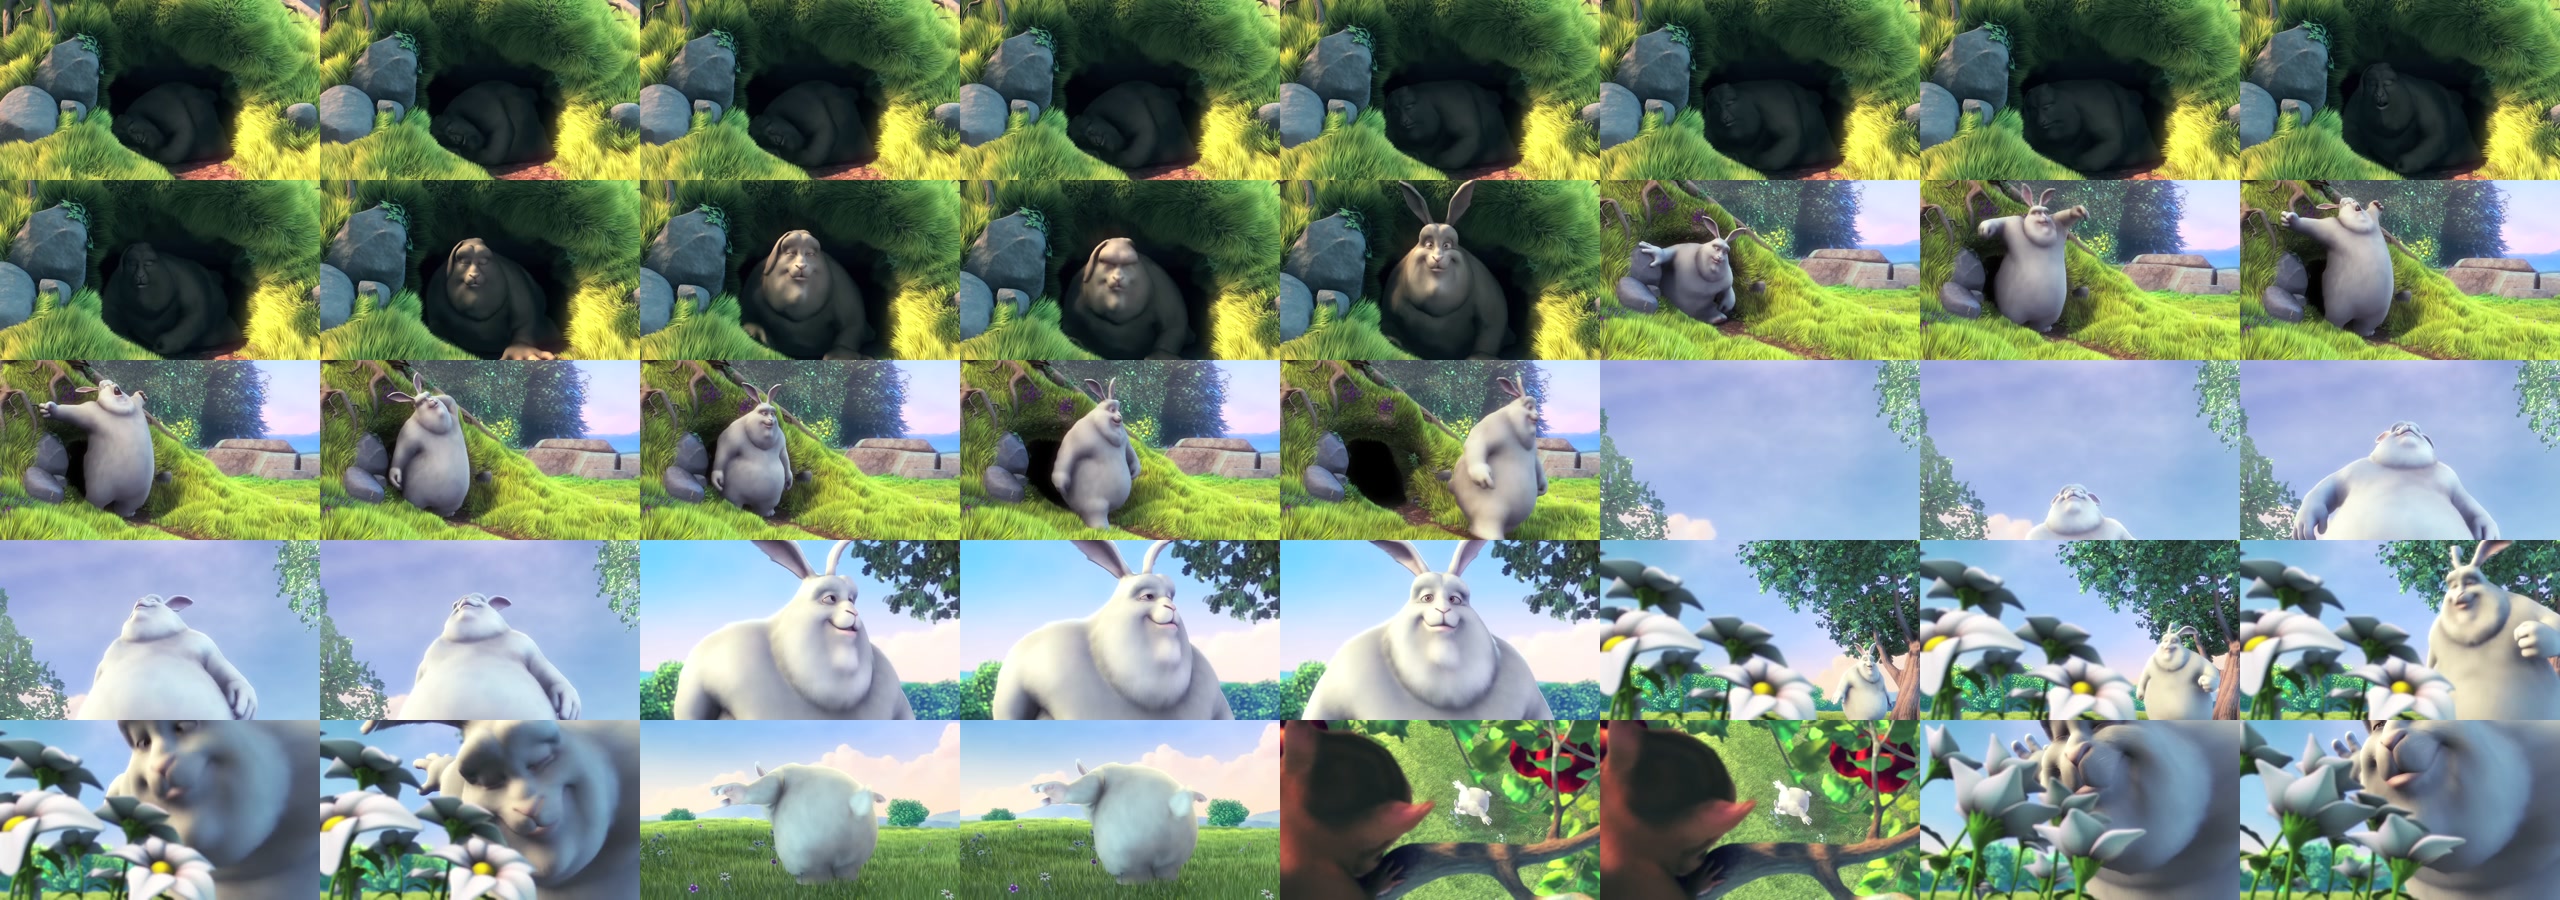
Sometimes you want to look at every frame at once — to scan a storyboard, compare moments of a sports play, or review a stretch of footage at a glance. A folder of 80 separate JPGs is the wrong shape for that: you have to unzip it, then drag the windows around to lay them out yourself. Flip the "Contact sheet" toggle on and the cutter does that work for you. You get back one image with all your frames laid out in a tidy grid: eight across, and as many rows down as you need (up to 80 frames in total — eight across, ten down).
The grid grows or shrinks to fit your frames — no empty black squares padding it out. Eight frames make a single row. Twenty-four make three rows. Eighty fills the whole eight-by-ten grid. Either way, you get one image you can drop into your photo app, paste into a Slack chat, print on one sheet of paper, or attach to an email. No more "first unzip the folder, then..." — the picture is ready to use as soon as the download finishes.
We chose eight frames across because the resulting picture comes out wide enough to look sharp on a big monitor, prints cleanly on letter or A4 paper, and is still small enough to email or post on Slack without the file shrinking and going blurry. Each thumbnail is the same size, so the picture stays neat whether you grab 16 frames (two rows) or 64 frames (a roughly square eight-by-eight block).
Using them together
Pulling frames is the basic feature; the timestamp stamp and the contact sheet are extra options you turn on if you want them. So you can do frames alone (a clean ZIP to hand off to a video editor), frames with stamps (a timestamped ZIP for review and analysis), or frames as a contact sheet (one big picture for an at-a-glance look). The one combination we haven't shipped yet is the contact sheet WITH timestamps on every thumbnail — we'll add that in a future update. For now, the contact sheet stays clean; if you need the times, generate the stamped ZIP and flip through the images instead.
One handy shortcut: there's a "Snapshot" button on the player (or just press the S key). It saves whatever frame is on screen right now — perfect for the "I just want THIS one image, right now" moment, without bothering to set a start and end time.
What we are working on next
We're working on two more things. First, putting the timestamp on every thumbnail of the contact sheet so the times come along when you look at the whole grid at once. Second, an automatic mode that picks out the moments where the picture actually changes — when the camera cuts to a new shot, or a goal is scored, or a slide flips — instead of grabbing a frame on a fixed timer. If either of those would save you steps you currently do by hand, drop us a line on the support page and we'll bump it up the list.
Try saving frames as pictures
Frames, stamps, contact sheets. Paste any YouTube URL to get started.
Open the cutter