What is a YouTube Video Trimmer?
A YouTube video trimmer is a tool that helps you cut a longer YouTube video down to the exact segment you want. Instead of sharing a full recording when you only need a short highlight, a trimmer lets you choose a start time and end time, preview the clip, and export the trimmed result. The goal is simple: keep what matters and remove everything that doesn’t.
In 2026, trimming is no longer a niche skill. Creators use trimming to turn long videos into Shorts and Reels-style moments. Marketing teams clip product demos into short ads. Teachers trim lectures into bite-size lessons. Support teams clip only the relevant steps in a troubleshooting video. And everyday users trim off awkward pauses, long intros, or the part where someone fumbles for the remote.
There are two common ways trimming happens. First, you trim a video file you already have: you import the file, select a range, and export. Second, you trim from a YouTube link using a YouTube trimmer online: you paste the URL, set timestamps, preview, and export. Link-based trimming is popular because it keeps the workflow light, especially when you only need a quick cut and you don’t want to open a heavy editor.
A trimmer is useful when you want to:
- Create short clips from long-form content for social media, newsletters, or landing pages.
- Remove intros, dead air, mistakes, or off-topic moments before sharing with customers or coworkers.
- Extract a key moment like a quote, reaction, highlight, or tutorial step without re-uploading a full video.
- Build a set of highlight clips from multiple videos for a recap, compilation, or portfolio.
- Save time when reviewing content by keeping only the chapters that matter to you.
The best YouTube video trimmer is the one that matches your intent. If you need effects and transitions, you might want a full editor. But if you only need clean cuts and quick exports, a dedicated YouTube trimmer is usually faster, easier, and less distracting.
Best YouTube Trimmer Tools in 2026
There are many ways to trim, but not all tools feel equally smooth. Some are optimized for quick clipping. Others are built for full-scale editing and feel slow for simple cuts. Below are the most practical options in 2026—starting with a focused online tool that prioritizes speed and clarity.
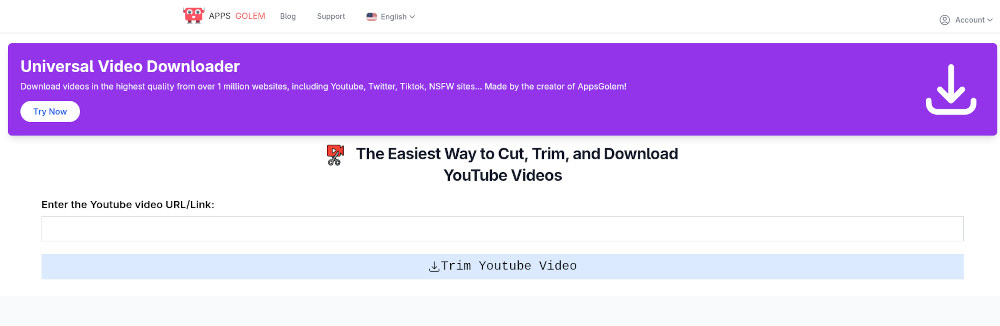
1. AppsGolem YouTube Trimmer
RecommendedIf you want a straightforward YouTube trimmer online experience without installing desktop software, AppsGolem is designed for fast, clean trims. It emphasizes the steps you actually need: paste a link, choose precise timestamps, preview, and export. This makes it a strong pick for creators, marketers, students, and anyone who wants results quickly.
Key features
- Timestamp-based trimming with an easy preview flow.
- Export options that fit common creator workflows.
- Audio extraction when you only need sound.
- Simple UI that stays focused on trimming.
- Works smoothly on desktop and mobile browsers.
Why people like it
- Quick turnaround for highlights, promos, and Shorts.
- Less clutter than full editing suites.
- Great for repurposing long videos into multiple clips.
- Consistent workflow across devices.
- Easy to learn for beginners.
How to use (quick overview)
- Open the AppsGolem YouTube Trimmer in your browser.
- Paste the YouTube video URL and load the video.
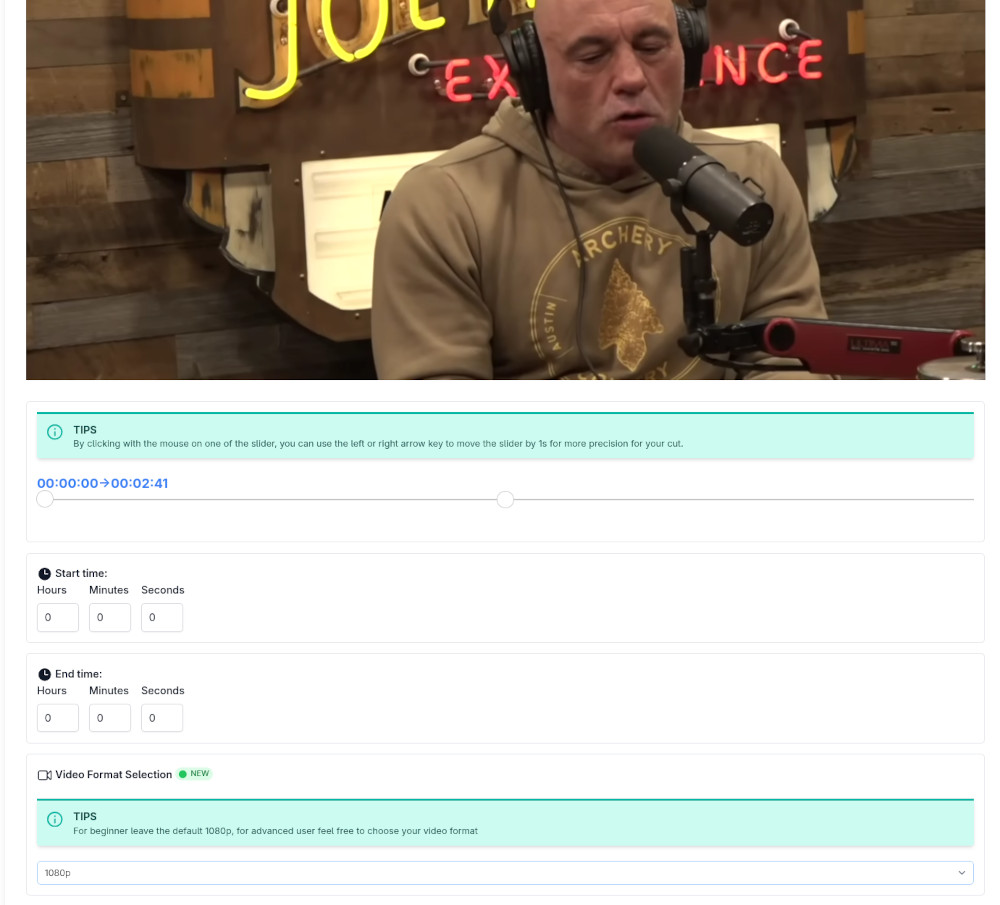
- Set your start time and end time using the trim controls.
- Preview the clip to confirm timing and audio cuts.
- Export the trimmed video or export audio if needed.
2. Other Options
Other tools can work well depending on your situation, but they often trade speed for complexity. If you are trimming once in a while, built-in editors may be enough. If you need a reliable, repeatable workflow for lots of clips, a dedicated YouTube video trimmer is usually the better fit.
Mobile gallery editors
Apps like Photos on iPhone and gallery editors on Android are great for quick cuts on saved videos. The downside is that they are not link-based, they can be limited for precise timestamp workflows, and they may not offer convenient audio extraction or consistent exports.
Desktop editing software
Full editors are powerful for multi-track timelines, transitions, captions, and effects. But for simple trimming, they can be slower to open, harder to learn, and easy to over-edit. If your goal is a clean cut and a quick export, a dedicated YouTube trimmer is usually faster.
Why AppsGolem often wins for trimming: it stays focused on the trimming job. Fewer clicks, fewer distractions, and a workflow that feels the same on desktop and mobile. That makes it practical when you trim frequently or when you need consistent results for a team.
How to Trim YouTube Videos Online
This workflow is the fastest way to get a polished clip: copy the YouTube link, paste it into a YouTube trimmer online, set timestamps, preview, and export. The steps below use AppsGolem as the example, but the process is similar for most online tools.
Copy the YouTube video URL
Open YouTube and locate the video you want to clip. Use the Share button to copy the link, or copy the URL from your browser’s address bar. If you already know the moment you need, write down the approximate time so you can jump close to it quickly.
If your goal is a highlight, look for a natural start and end. Start a second before the speaker begins the key point and end after the idea finishes. This tiny buffer makes the final clip feel smoother and more professional.
Paste the link into a YouTube trimmer online
Open your preferred YouTube trimmer online, such as AppsGolem, and paste the URL into the input field. The tool should load the video and prepare trimming controls. On mobile, this usually works the same way in your browser.
If a link does not load immediately, confirm you copied the full URL. A clean link keeps the workflow smooth and prevents confusing errors.
Set your start and end timestamps
Choose the exact start and end times for your clip. Many trimmers support manual entry (like 01:12 to 01:45), timeline handles, or both. For best results, set an initial range that is slightly longer than you need, then tighten it after previewing.
Practical trimming rule
Trim for meaning, not just duration. Start where the idea begins and end where it completes. A 12-second clip can feel too short if it cuts off context, while a 20-second clip can feel perfect if it contains a complete thought.
If you are trimming a tutorial, aim for the smallest complete step: the click that matters, the setting you need, the visible result, and a short confirmation line. If you are trimming a reaction or highlight, keep the moment and the payoff together so the clip has a clear arc.
Preview the clip and refine the cut
Preview is where good clips are made. Play the first few seconds and listen to the audio cut. Then jump near the end and confirm the final frame. If the clip ends mid-word or the last sound gets chopped, extend the end time slightly.
For dialogue clips, pay attention to breathing and the first consonant of a sentence. For music clips, avoid cuts that start off-beat unless that is the effect you want. For screen recordings, ensure that the viewer sees the cursor movement that leads to the action, not only the action itself.
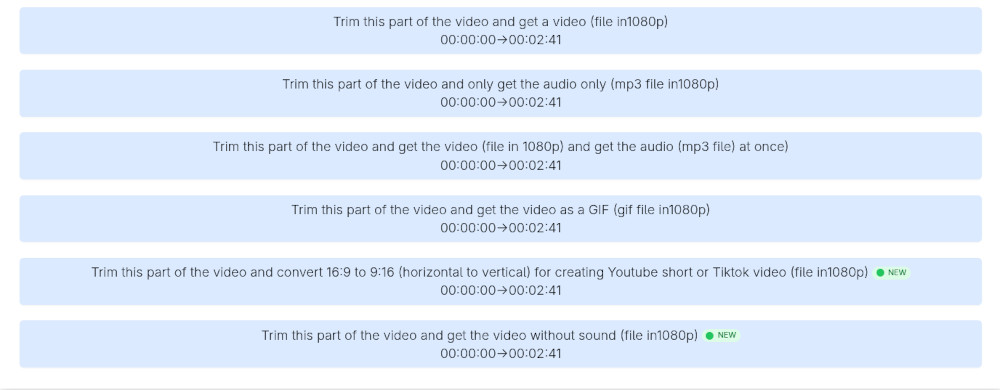
Export the trimmed video or extract audio
Once the timestamps are correct, export the clip. If you need a video snippet for social or a presentation, export video. If you only need a quote, voice line, or music section, export audio to keep the file smaller and easier to share.
If your clip is meant for vertical platforms, consider whether you need a separate vertical edit later. Trimming is the fastest first step: get the best segment first, then adapt the framing if needed. In many workflows, trimming is the difference between having usable raw material today and putting off the task for weeks.
Choose video export when
- You need visuals for tutorials, reactions, or demos.
- You are sharing the clip with a client or team.
- You want to post the clip on social media.
Choose audio export when
- You only need the sound for a podcast reference or quote.
- You want smaller files for quick sharing.
- You plan to edit audio separately later.
Common trimming mistakes to avoid
- Cutting too tight and losing context.
- Forgetting to listen to the audio cut.
- Exporting a format that does not match your destination.
- Re-encoding unnecessarily and reducing quality.
How to Trim YouTube Videos on Mobile
Mobile trimming is perfect when you want to publish quickly or collect clips while traveling. You can trim a saved video using built-in editors, or use a YouTube trimmer online in your browser for a link-based workflow. Both approaches can work, so pick the one that fits your situation.
iPhone
If the video is already saved on your iPhone, the Photos app is the fastest option for basic trimming. Open Photos, choose the video, tap Edit, and drag the handles to set the start and end. Tap Done and save a copy if you want to keep the original version intact.
For link-based trimming, an online trimmer in Safari can be more convenient. Paste the YouTube URL, set precise timestamps, preview, and export. This approach is especially helpful when you need a very specific range, when you want to extract audio, or when you prefer not to manage large video files on your device.
If you plan to share on social, preview the clip once more after export. Mobile audio can be unforgiving, and a tiny adjustment of half a second can make a clip feel dramatically more polished.
Android
On Android, Google Photos or your gallery app usually offers a quick trim feature. Open the video, tap Edit, choose Trim, and adjust the range. Save a copy so you can keep the original file untouched. This is a great choice for fast cuts that do not require special export options.
For more control, use a YouTube trimmer online in your browser. Paste the URL, set timestamps, preview, and export. This is helpful when you are trimming multiple clips and you want consistent results, or when you need features like audio extraction and repeatable timestamp trimming.
If your device offers different export qualities, pick a setting that matches the original resolution to avoid accidental downscaling. The simplest way to keep quality is to avoid exporting at a lower resolution than the source.
Mobile tip
If you are trimming educational content, cut around complete ideas rather than arbitrary durations. A clip that contains a full explanation will be rewatchable and shareable, while a clip that ends abruptly will frustrate viewers and reduce retention.
Advanced Trimming Tips
Once you can trim confidently, the next step is improving quality, speeding up repetitive work, and producing clips that are easier to reuse. The tips below help you get better results without turning trimming into a complicated editing project.
Trimming without quality loss
Quality loss usually comes from re-encoding during export. If a tool can cut without re-encoding, you will typically get the sharpest results and the fastest processing. When re-encoding is necessary, choose settings that match the original resolution and avoid overly aggressive compression.
Watch for common quality problems: blurry motion, blocky backgrounds, and washed-out details. If you see these issues, try exporting at a higher quality setting or using a format that preserves detail better. Also consider keeping your clip slightly longer and trimming again more precisely, because some exports handle cut points better with a bit more context.
If your clip will be uploaded again to another platform, remember that platforms often compress videos a second time. Starting with a higher-quality export usually leads to a better final result after platform compression.
Batch trimming multiple videos
Batch trimming saves a surprising amount of time. If you create clips from webinars, podcasts, interviews, or tutorials, you can build a simple system: collect links, note timestamps, and export clips in a consistent naming format. The key is to standardize your workflow so each clip takes minutes instead of restarting from scratch.
- Create a small list of videos with the exact start and end times you want.
- Trim the first video carefully to set your quality and pacing standard.
- Apply the same logic across the rest: keep a lead-in, keep the payoff, and avoid abrupt cuts.
- Name exports clearly with a topic and timestamp range so you can find them later.
Batch trimming also improves consistency. When your clips have similar pacing and clean boundaries, they feel like part of the same series. That consistency is valuable for channels, newsletters, and product pages.
Extracting audio while trimming
Sometimes the most useful part of a YouTube video is the audio: a memorable quote, a voiceover, a music reference, or a sound cue. Extracting audio while trimming lets you save only the sound from the segment you need, which keeps files smaller and sharing easier.
Audio extraction is also a powerful research tool. You can collect short audio references for later editing, practice, or review. If you work with voice and sound regularly, trimming audio clips can become as valuable as trimming video clips.
If you plan to edit the audio further, choose a higher-quality export when available. If you only need to share a reference quickly, a smaller file is often enough.
Extra tip: trim for retention
The most shareable clips usually do three things: they start quickly, they deliver one clear idea, and they end cleanly. When trimming, remove anything that delays the payoff. If the first three seconds are not compelling, tighten the start. If the clip drifts after the main point, tighten the end. This simple approach often increases watch time and makes your content feel more intentional.
FAQ
These questions target common questions around YouTube video trimmers, YouTube trimmers, and YouTube trimmer online workflows. If you are trying to solve a specific trimming issue, start here.
What is a YouTube video trimmer? Open Close
A YouTube video trimmer is a tool that lets you select a start time and end time so you can export only the segment you want. It is ideal for highlights, tutorials, quotes, and removing dead air.
Is a YouTube trimmer online safe to use? Open Close
In general, use reputable tools and avoid sites that ask for unnecessary permissions. A safe trimming workflow should feel transparent: paste a link, set timestamps, preview, and export. If something feels suspicious or overly complicated, choose a different tool.
Can I trim a YouTube video without losing quality? Open Close
Yes. Avoid quality loss by minimizing re-encoding. If re-encoding is required, export at the original resolution and avoid heavy compression. Also remember that uploading to social platforms can compress again, so starting with a high-quality export helps.
What is the easiest way to trim YouTube videos online? Open Close
The easiest way is a browser-based tool: copy the YouTube link, paste it into the trimmer, set start and end timestamps, preview, and export. This approach is fast and works on desktop and mobile without installing software.
How do I trim YouTube videos on iPhone? Open Close
Use Photos for basic trimming: open the video, tap Edit, adjust the trim handles, and save. For link-based trimming and audio extraction, use a YouTube trimmer online in Safari.
How do I trim YouTube videos on Android? Open Close
Use Google Photos or your gallery editor for quick cuts. For a link-based workflow, consistent exports, or audio extraction, use an online YouTube video trimmer in your mobile browser.
Can I batch trim multiple YouTube videos? Open Close
Yes. Batch trimming is ideal when you need many highlight clips. Prepare your timestamps, trim in a consistent style, and export with clear naming so clips stay organized and easy to reuse.
Conclusion
A great YouTube video trimmer should feel effortless: paste a link, set your timestamps, preview, and export. If you want a focused YouTube trimmer online workflow that works on desktop and mobile, AppsGolem is a simple way to produce clean clips without getting lost in a full editing suite.
Tip: Bookmark this guide so you can return anytime you need a quick trim, a mobile workflow, or an audio export.